Step 1. Apache 설치하기
- 아래 명령어를 통해 패키지를 설치합니다.
- JBoss와 연동을 위해 httpd 외 패키지도 설치합니다.
yum list httpd --showduplicates
yum install httpd httpd-devel gcc redhat-rpm-config make
Step 2. mod_jk 다운 및 설정하기
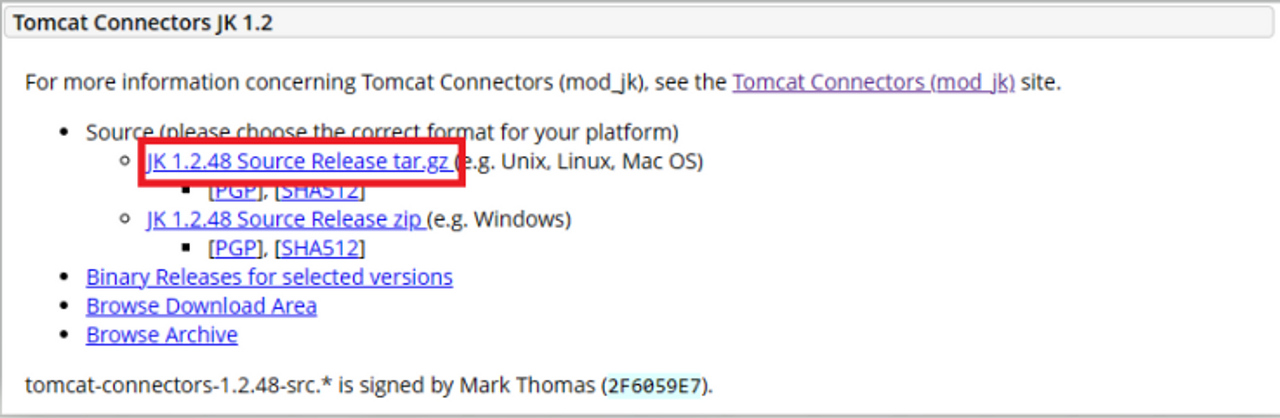
- 아래 경로에서 mod_jk 파일 다운로드 경로를 확인합니다.
- JK 1.2.48 Source Release tar.gz 링크 우클릭 후 링크 복사합니다.
- wget 명령어를 통해 다운로드 받고 압축을 해제합니다.
wget https://dlcdn.apache.org/tomcat/tomcat-connectors/jk/tomcat-connectors-1.2.48-src.tar.gz
tar -xf tomcat-connectors-1.2.48-src.tar.gz
- 아래 절차를 통해 mod_jk 모듈을 설치합니다.
### 디렉토리 이동
cd tomcat-connectors-1.2.48-src/native/
### apxs 위치 찾기
find / -name "apxs" -print
/usr/bin/apxs
### 컴파일을 위한 설정 진행, apxs 경로 입력
./configure --with-apxs=/usr/bin/apxs
### 컴파일
make
make install
### httpd module 디렉토리 이동
cd /etc/httpd/modules/
### ls 명령어로 모듈 설치된 것을 확인
ls -al | grep mod_jk
-rwxr-xr-x. 1 root root 1990936  7월 12 10:17 mod_jk.so
Step 3. http.conf 편집 및 서비스 실행하기
- 아래 절차를 통해 http 설정 파일을 수정, 추가 합니다.
### 디렉토리 이동
cd /etc/httpd/conf

### httpd.conf 파일 편집
vi httpd.conf

### 아래 내용 추가 후 저장(60번 줄)
 LoadModule jk_module modules/mod_jk.so
 JkWorkersFile conf/workers.properties
 JkLogFile logs/jk.log
 JkLogLevel info
 JkLogStampFormat "[%a %b %d %H:%M:%S %Y]"
 JkMount /* worker1
 ##100번줄 쯤 ServerName 수정
 ServerName localhost

### workers.properties 파일 생성
vi workers.properties

### 아래 내용 작성 후 저장
 # Define 1 real worker using ajp13
 worker.list=worker1
 #worker.stat1.type=status
 # Set properties for worker1 (ajp13)
 worker.worker1.type=ajp13
 # JBoss Server IP
 worker.worker1.host=192.168.0.121
 worker.worker1.port=8009
- 아래 명령을 통해 http 서비스를 시작합니다.
chcon -u system_u -r object_r -t httpd_modules_t /etc/httpd/modules/mod_jk.so
setenforce 0
systemctl restart httpd.service
systemctl enable httpd.service
- 아래 명령을 통해 http 방화벽을 해제합니다.
# Web
firewall-cmd --permanent --add-port=80/tcp
# 방화벽 재시작
systemctl restart firewalld.service
Step 4. JBoss 설정
- JBoss에서 Ajp 프로토콜을 사용하도록 설정 해 줍니다.
- 아래 설정은 JBoss 서버에서 진행합니다.
- JBoss의 설치 경로로 이동해 $JBOSS_HOME/standalone/configuration/standalone.xml 파일을 수정합니다.
### 디렉토리 이동
cd /opt/rh/eap7/root/usr/share/wildfly/standalone/configuration
### standalone.xml 편집하기
vi standalone.xml
### 아래 내용에 맞춰 ajp 추가하기
... 490번 줄 <ajp-listener> 추가
489             <server name="default-server">
490                 <ajp-listener name="ajp" scheme="http" socket-binding="ajp"/>
491                 <http-listener name="default" socket-binding="http" redirect-socket="https" enable-http2="true"/>
492                 <https-listener name="https" socket-binding="https" security-realm="ApplicationRealm" enable-http2="true"/>
493                 <host name="default-host" alias="localhost">
494                     <location name="/" handler="welcome-content"/>
495                     <http-invoker security-realm="ApplicationRealm"/>
496                 </host>
497             </server>
... 527번 줄 socket-binding ajp 되어있는지 확인
527         <socket-binding name="ajp" port="${jboss.ajp.port:8009}"/>
systemctl restart eap7-standalone.service
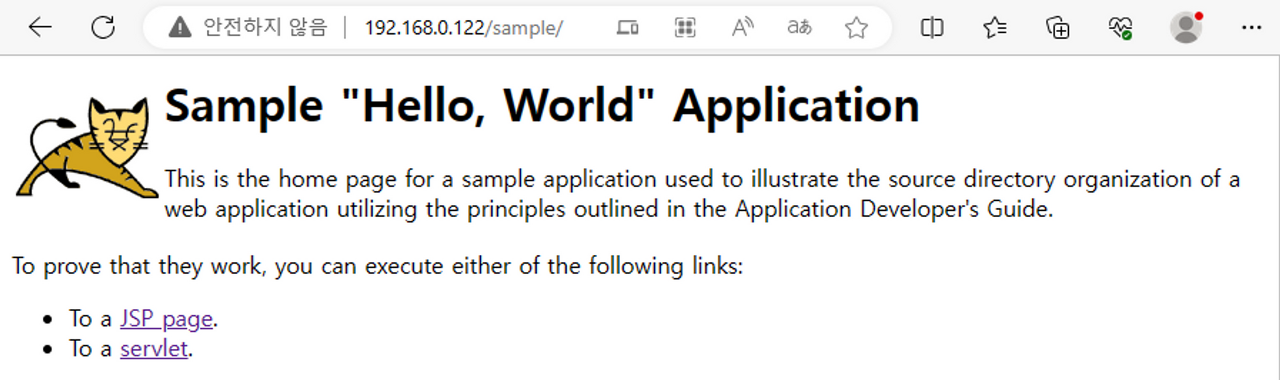
- Apache 웹서버에 접속하면 JBoss WAS의 URL과 일치하는 컨텐츠를 제공하는것을 확인할 수 있습니다.
오류 수정
- 위 절차대로 설정을 완료한 후 재부팅 시 httpd.service가 정상 작동중이지 않을때 아래 절차대로 적용합니다.
- 아래 오류는 RHEL의 Selinux가 Apache 접근을 차단하기 때문에 발생합니다.
- 아래 절차를 통해 재부팅마다 Selinux의 설정을 변경합니다.
### rc.local 파일을 편집합니다.
vi /etc/rc.d/rc.local
### 아래 내용을 추가합니다.
 chcon -u system_u -r object_r -t httpd_modules_t /etc/httpd/modules/mod_jk.so
 setenforce 0
 systemctl restart httpd.service
### rc.local의 실행권한을 부여합니다.
chmod +x /etc/rc.d/rc.local
### rc-local.service를 등록하고 실행시켜줍니다.
systemctl enable rc-local.service
systemctl restart rc-local.service